Easy Nutella Crepes: Recreate Paris Brunch Delights at Home
Imagine strolling along a charming Parisian street, the air alive with the scent of fresh pastries and rich coffee. Then, you spot it: a bustling crepe stand, where a skilled chef expertly swirls thin batter on a hot griddle, creating delicate, golden discs. Moments later, one is generously slathered with that irresistible hazelnut and chocolate spread, Nutella, folded, and handed to you—a warm, sweet, utterly blissful experience. This isn't just a fantasy; it's a simple pleasure that you can easily recreate in your own kitchen. Our comprehensive guide will show you how to master the art of making delicious
Nutella crepes, bringing a taste of French café culture right to your home.
The Allure of Parisian Nutella Crepes
Crepes hold a special place in the hearts of many, symbolizing elegance, simplicity, and indulgence. In Paris, crepe stands are as iconic as baguette bakeries, offering a quick, satisfying treat at any time of day. While traditionally spread with a wooden tool called a *rateau*, the essence of making thin, pliable crepes remains accessible to home cooks with just a good non-stick pan.
The magic truly begins when that warm, tender crepe meets Nutella. This creamy, dreamy blend of roasted hazelnuts, cocoa, and a touch of sweetness has transcended its Italian origins to become a global phenomenon. Once a rare find outside specialty shops in America, Nutella is now a beloved staple in most supermarkets, making those Parisian brunch dreams easily attainable. Its velvety texture and comforting flavor are the perfect complement to the delicate crepe, creating a harmonious symphony of taste that's hard to beat. Making
perfect Nutella crepes at home means you control the quality of ingredients and, most importantly, the generosity of your Nutella spread!
Gather Your Ingredients & Essential Tools
Making homemade crepes is surprisingly straightforward, requiring only a handful of pantry staples and basic kitchen equipment. The secret to truly exceptional crepes often lies in the details—like browning your butter for an extra layer of nutty flavor.
For the Crepes:
- 1 cup (120g) all-purpose flour
- 2 large eggs + 1 egg yolk (the extra yolk adds richness and tenderness)
- 1 ½ cups (360ml) whole milk
- ¼ cup (60ml) water
- 2 tablespoons unsalted butter, plus extra for greasing the pan
- 1 tablespoon granulated sugar (for a subtly sweet crepe)
- ¼ teaspoon salt
For the Filling & Toppings:
- Nutella (as much as your heart desires!)
- Optional: Powdered sugar, sliced bananas, fresh berries (strawberries, raspberries, blueberries), whipped cream, chocolate syrup, caramel sauce, chopped nuts.
Essential Tools:
- Medium mixing bowls (at least two)
- Whisk
- Measuring cups and spoons
- Fine-mesh strainer (optional, but recommended for a super smooth batter)
- Non-stick skillet (8-10 inches is ideal for classic crepes)
- Rubber spatula (for lifting and flipping)
- Paper towels
Crafting the Perfect Crepe Batter: The Secret to Success!
The journey to perfect crepes begins with a smooth, lump-free batter. Our recipe incorporates a special step – browning the butter – that elevates the flavor profile from good to extraordinary.
1.
Brown the Butter: In a medium nonstick pan (the same one you'll cook the crepes in!), melt the 2 tablespoons of unsalted butter over medium heat. Continue cooking, swirling occasionally, until the butter turns a beautiful golden brown and smells nutty. Be vigilant; it can go from golden to burnt quickly! Remove from heat immediately. The residual heat will continue to brown it slightly, so err on the side of golden versus dark. Set aside to cool slightly.
2.
Combine Wet Ingredients: In a medium bowl, gently whisk together the eggs, egg yolk, water, milk, and salt until just combined.
3.
Mix Dry Ingredients: In a separate medium bowl, whisk together the flour and granulated sugar.
4.
Form the Batter: Slowly pour the wet ingredients into the dry ingredients, whisking constantly until just smooth. Avoid overmixing, as this can develop the gluten too much, leading to tougher crepes.
5.
Add Browned Butter: Gradually pour the slightly cooled browned butter into the batter, whisking continuously until fully incorporated. The nutty notes of the browned butter infuse into the batter, adding incredible depth.
6.
Strain for Smoothness (Optional but Recommended): For the absolute silkiest crepes, pour the batter through a fine-mesh strainer into another clean bowl to remove any tiny lumps. This guarantees a flawlessly smooth texture.
7.
Rest the Batter: This is a crucial step! Cover the bowl with plastic wrap and let the batter rest at room temperature for at least 10-15 minutes, or ideally 30 minutes. This allows the flour to fully hydrate and the gluten to relax, resulting in more tender, flexible crepes that are less likely to tear. For an even richer flavor, you can refrigerate the batter for up to 24 hours – just bring it to room temperature before cooking.
Cooking Your Golden Crepes to Perfection
With your perfect batter ready, it's time to bring those Parisian dreams to life on the stovetop.
1.
Prepare Your Pan: Wipe out the nonstick pan you used for the browned butter with a paper towel. Set it over medium heat. If necessary, lightly grease the pan with a tiny bit of butter, wiping away any excess with a paper towel. You want a very thin, almost invisible, layer of grease.
2.
Pour and Swirl: Once the pan is hot (a drop of water should sizzle), use a 1/3-cup measure to scoop the batter. Pour it into the center of the hot pan. Immediately lift the pan and, using a rotating motion with your wrist, swirl the batter around and out to the edges of the pan, thinly coating the bottom. The thinner the crepe, the better! Quickly pour any excess batter back into the bowl.
3.
Cook the First Side: Return the pan to the heat and cook for about 1-2 minutes. You'll see the edges crisp slightly and the surface develop tiny bubbles, then settle. The bottom should be golden brown.
4.
Flip the Crepe: Use a thin rubber spatula or your fingertips to gently lift an edge of the crepe. Once you can get underneath it, swiftly flip the crepe over. Cook on the second side for another 30 seconds to 1 minute, or until lightly golden.
5.
Remove and Repeat: Slide the cooked crepe onto a plate. You can stack them as you go; they won't stick together. Repeat with the remaining batter, lightly greasing the pan between crepes if needed. Remember, the first crepe is often a "test crepe" – don't worry if it's not perfect! Adjust your heat and batter amount as you learn the rhythm of your pan.
Filling, Folding & Flavorful Variations
The best part! Once your stack of golden crepes is ready, it's time for the ultimate indulgence: Nutella.
1.
Spread the Nutella: Take one warm crepe and lay it flat on a plate. Spread a generous tablespoon (or more!) of Nutella over one half of the crepe.
2.
Fold it Up: There are a few classic ways to fold:
*
Triangle: Fold the crepe in half, then fold it in half again to form a neat triangle.
*
Roll: Simply roll up the crepe loosely like a carpet or a cigar. This is perfect for a quick, handheld treat.
*
Half-Moon: For a more open presentation, simply fold it in half.
3.
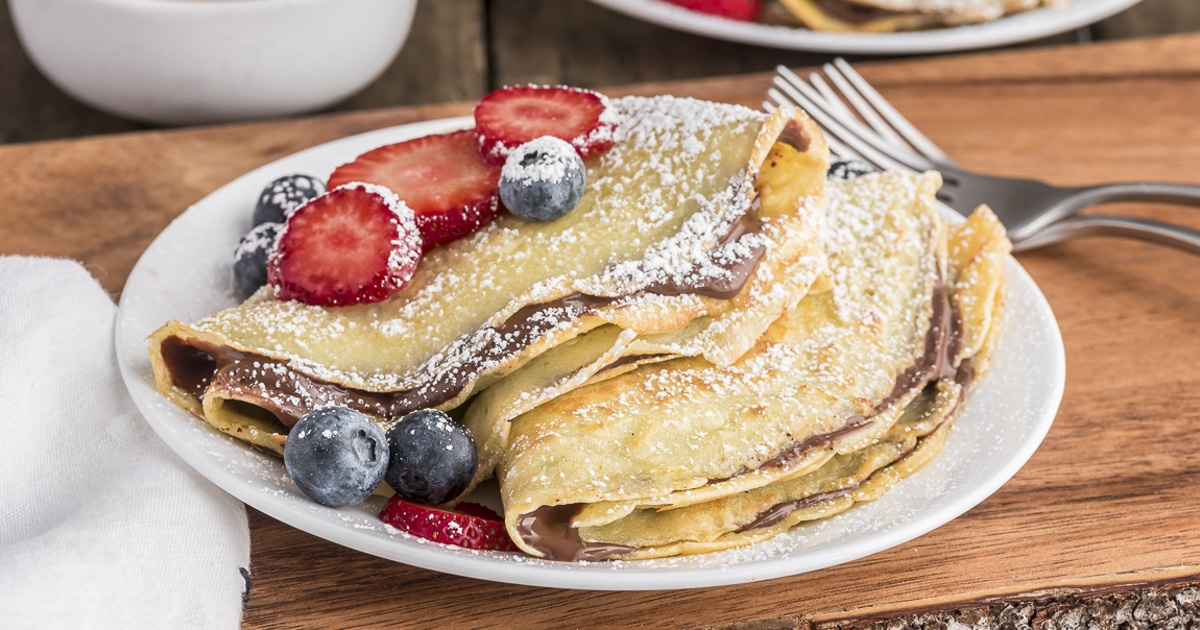
Garnish and Serve: Arrange your filled crepes on a platter. Now, let your imagination run wild with toppings!
*
Classic Simplicity: A dusting of powdered sugar adds a touch of elegance and sweetness.
*
Fruity Freshness: Sliced bananas are a match made in heaven with Nutella. Fresh berries like strawberries, raspberries, or blueberries add a bright, tangy contrast.
*
Extra Indulgence: A dollop of whipped cream, a drizzle of chocolate or caramel sauce, or a sprinkle of chopped toasted hazelnuts or almonds can elevate your crepes to dessert status.
*
Brunch Bar Idea: Set up a "build-your-own crepe" station with various fruits, sauces, and toppings for a fun and interactive brunch experience.
Making
homemade Nutella crepes is a guaranteed way to satisfy any sweet craving and impress your friends and family. They’re perfect for a leisurely weekend brunch, a special dessert, or even a delightful weeknight treat that feels far more elaborate than it is.
Conclusion
You've now unlocked the secrets to crafting exquisite Nutella crepes at home, transforming simple ingredients into a taste of Parisian elegance. From the nuanced flavor of browned butter in your silky batter to the joy of spreading that luscious Nutella, every step is designed for success and satisfaction. So, ditch the crowded brunch spots, gather your loved ones, and immerse yourselves in the simple, sweet pleasure of homemade Nutella crepes. Bon appétit!